Introduction
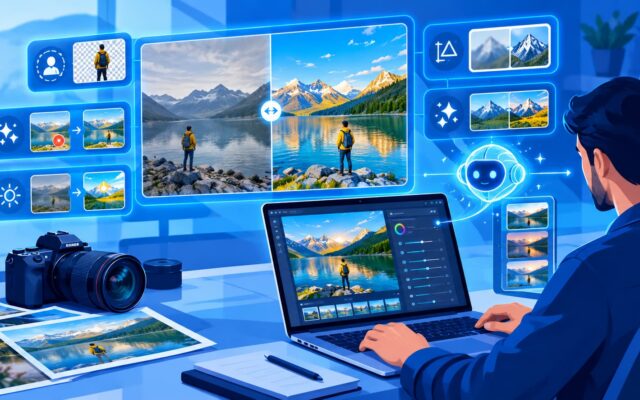
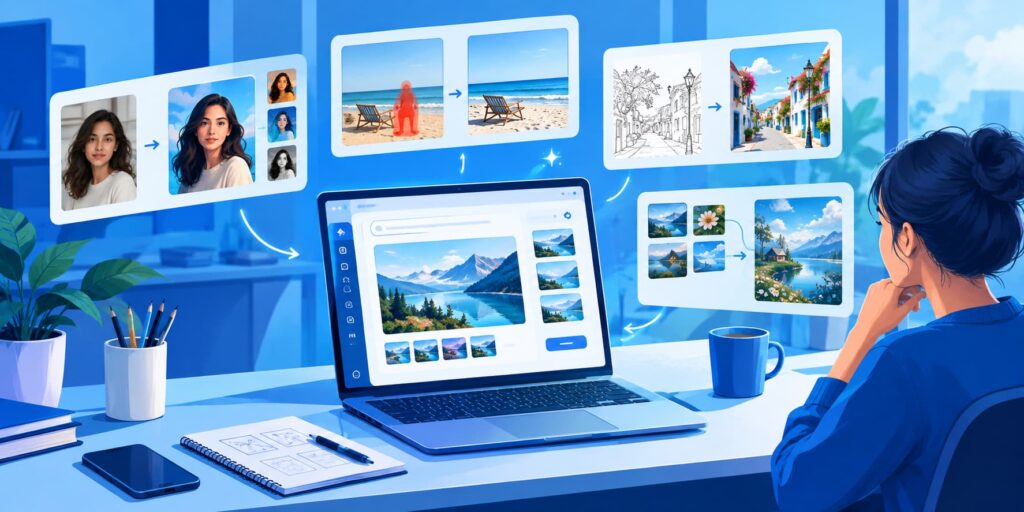
I tested ChatGPT Images 2.5 to see how far its image tools have come. Beyond generating images from a prompt, it can edit photos, add or remove objects, follow visual instructions, transform sketches, combine references, and create graphics with text. Here’s what I learned.
What Is ChatGPT Images 2.5?
ChatGPT Images 2.5 is an updated image-generation and editing experience inside ChatGPT. Instead of treating AI image creation as a simple “write a prompt and get a picture” process, it brings generation and editing into a more flexible workflow.
During my testing, I found that the biggest difference is the amount of control available after the first image is created. You can start with a text description, upload an existing photograph, provide reference images, mark an area that needs changing, or even use a rough sketch to communicate an idea.
The ChatGPT image generator can create scenes from scratch based on instructions about subjects, environments, lighting, composition, and style. But the same workflow can also be used for ChatGPT image editing, where the goal is to change an existing image without rebuilding everything.
For example, instead of generating a new person, I could upload a photograph and ask for a different outfit or background. I could also ask for an unwanted object to be removed or point to a specific part of the image that needed changing.
If you want to explore other AI-powered utilities alongside image tools, you can also browse the AI Tools available on AIGuidePro.
Practical takeaway: Think of ChatGPT Images 2.5 less like a basic image generator and more like a conversational image workspace.
How to Access ChatGPT Images 2.5
Getting started is straightforward.
I opened ChatGPT and selected Images from the available interface. The exact placement and available features can vary depending on the ChatGPT experience, account, rollout, and platform, so your interface may not look exactly like mine.
Once inside the image area, I could explore different image-generation ideas and previously created work. Templates and example ideas can be useful because they show the type of visual instructions that can be used to produce a particular result.
My basic workflow
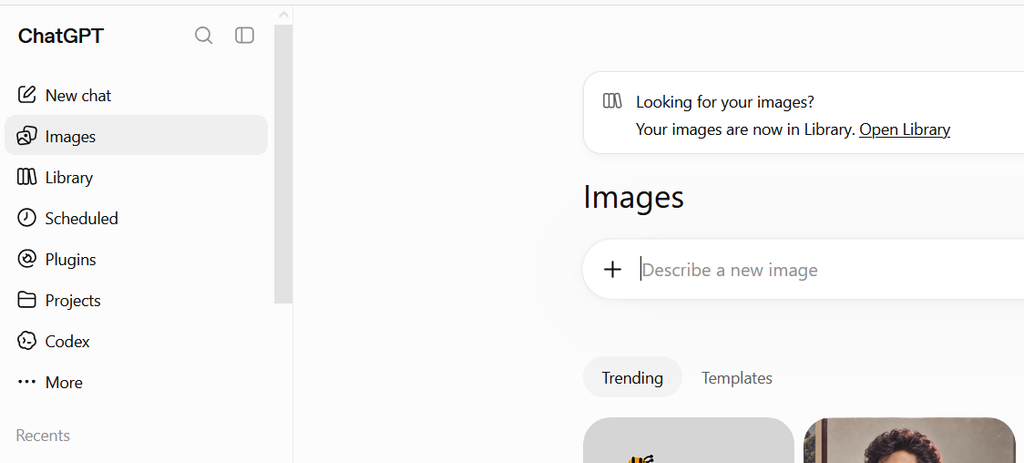
- Open ChatGPT.
- Select Images.
- Explore the image-generation interface.
- Look through available templates or ideas.
- Open previous creations when you want to reuse or refine an image.
- Upload an image when the task requires a reference photo.
- Describe the result you want.
The important part is that you don’t need to understand complicated image-generation settings before starting. You can communicate with the tool in ordinary language.
For someone new to AI image generation, this makes the learning curve much smaller.
Practical takeaway: Start with a simple request rather than trying to write the perfect prompt immediately. You can improve the result through conversation.
How to Use Templates and Ideas
One of the easiest ways I found to understand the image workflow was to experiment with templates and suggested ideas.
Instead of staring at a blank prompt box wondering what to write, templates give you a starting point. They can demonstrate different visual concepts, transformations, compositions, and styles.
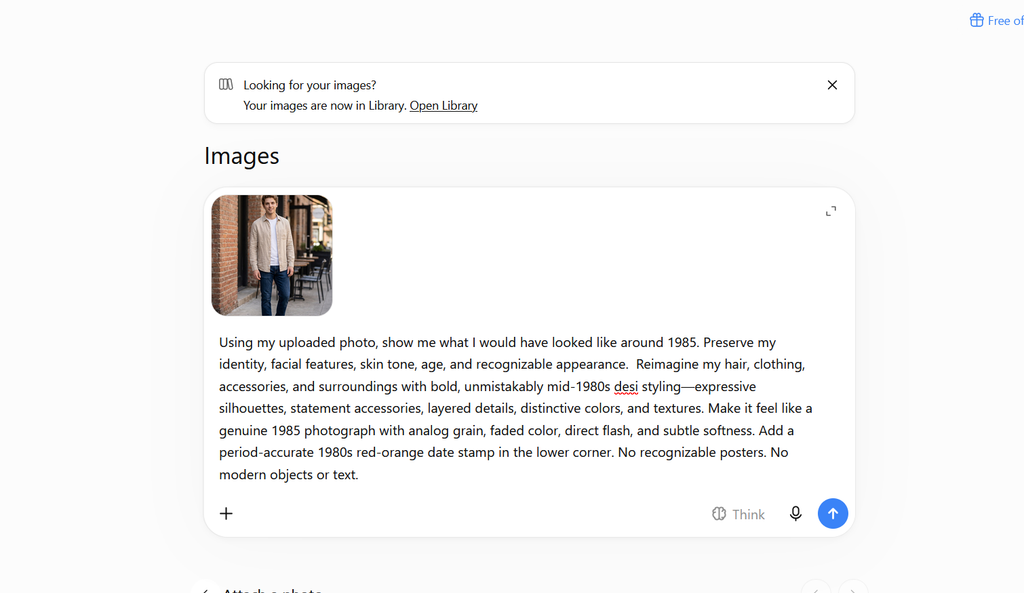
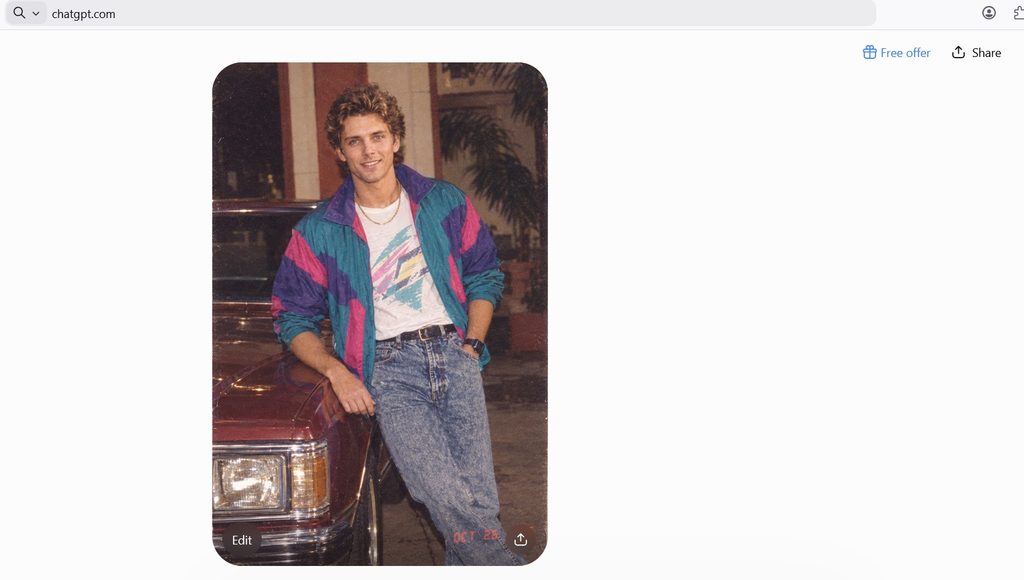
For example, imagine you have an ordinary portrait and want to see how it would look as an 1980s-style photograph. Rather than describing every possible detail yourself, you can start with an existing idea and then provide your photograph as a reference.
My template workflow
1. Explore trending ideas
Start by looking through the available image ideas. Pay attention to the types of transformations being suggested.
2. Study the instructions
Templates can also teach you how prompts are structured. You may notice descriptions of lighting, clothing, camera style, background, composition, or color.
3. Upload your own photo
When a template requires a reference image, upload the photograph you want to transform.
4. Apply the visual idea
Tell ChatGPT what you want changed. For example:
Transform this portrait into a cinematic 1980s studio photograph while preserving the person’s facial identity and pose.
You can then add details such as film grain, clothing, lighting, or background.
5. Review and share
Once you’re happy with the result, you can use the available options to share or save the image.
6. Revisit previous creations
The image library is particularly useful when experimenting. Instead of losing an earlier version, you can return to previous creations and continue exploring.
I found this useful because image creation is rarely perfect on the first attempt. Sometimes the second or third variation is much closer to the original idea.
Practical takeaway: Templates are not just shortcuts. They can be useful learning tools for understanding how visual prompts work.
How to Generate Images From Scratch
The most familiar use of the ChatGPT AI image generator is creating an image from a text description.
The basic process is simple: describe what you want, generate the image, inspect it, and refine the instructions.
However, there is an important difference between a vague prompt and a useful one.
Compare:
A professional office.
with:
A modern open-plan office with three professionals working around a wooden table, large windows, soft morning sunlight, indoor plants, neutral colors, realistic photography, wide horizontal composition.
The second prompt gives the model more visual information to work with.
What I include in an image prompt
I generally think about five things:
- Subject: What should appear?
- Environment: Where is it?
- Composition: How should the scene be arranged?
- Lighting: What should the light look like?
- Style: What visual treatment should be used?
You don’t always need all five.
For a simple icon, a short prompt may work perfectly. For a complex marketing image, more detail can reduce ambiguity.
Example prompt
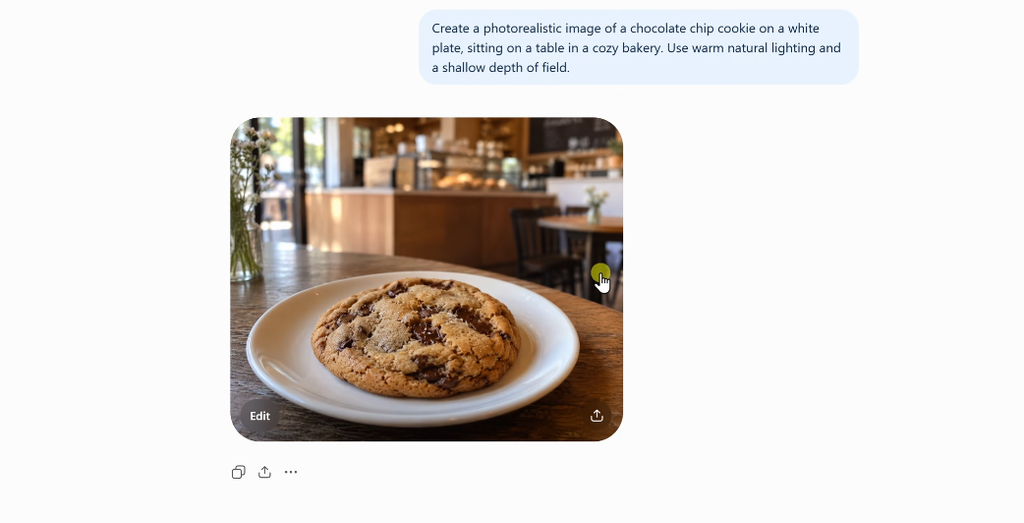
Create a realistic horizontal image of a young entrepreneur working on a laptop in a bright modern workspace. Include a notebook, coffee cup, and smartphone on the desk. Use soft natural window light, neutral colors, shallow depth of field, and a clean professional composition.
After generating the image, I don’t immediately start over if something is wrong.
Instead, I refine it.
For example:
Make the workspace brighter and move the notebook closer to the laptop.
Or:
Keep the composition but replace the coffee cup with a water bottle.
This conversational approach is one of the most useful parts of the workflow.
Practical takeaway: Treat the first generated image as a draft. Clear follow-up instructions can be more efficient than rewriting the entire prompt.
How to Add and Remove Objects
Object editing is where ChatGPT image editing becomes particularly useful.
Suppose you have a photograph of a desk and notice an object you don’t want in the final image. You can ask ChatGPT to remove it rather than recreate the entire scene.
The same idea works in reverse. You can ask for a new object to be added.
Adding an object
Start with the image you want to edit and describe what should be added and where it should appear.
For example:
Add a small green plant on the right side of the desk. Keep the existing lighting and perspective consistent with the photograph.
If the interface provides a way to comment on or identify an area, use that to make your instruction more precise.
Instead of saying:
Add a lamp.
you can indicate the exact area and say:
Add a small desk lamp in this marked area. Make it match the lighting and perspective of the existing scene.
Removing an object
The erase functionality can be useful when you want to clean up a photo.
For example:
Remove the phone from the desk and reconstruct the surface naturally.
The goal isn’t simply to delete pixels. The surrounding area needs to look believable after the object disappears.
Compare versions
I recommend comparing the edited image with the original.
Look at:
- Shadows
- Reflections
- Object edges
- Background details
- People’s appearance
- Lighting consistency
- Texture around the edited area
Small changes can sometimes affect nearby details.
If an edit moves in the wrong direction, return to an earlier version rather than continuously modifying the latest result.
Practical takeaway: Use object editing for targeted changes. It is especially useful when most of the original image is already correct.
How to Make Precise Edits With Markup
One of the most interesting approaches I tested was using visual markup to explain an edit.
Words can sometimes be ambiguous. If I say “change the object on the left,” the system needs to understand which object I mean. A visual marker can make the instruction much clearer.
How I use markup
- Open the image-editing workflow.
- Select the markup option when available.
- Draw directly over the image.
- Use an arrow, circle, box, or other visual marker.
- Explain what should happen to the marked area.
- Generate the revised version.
For example, imagine a product photograph with three objects.
Instead of writing:
Change the bottle.
I can mark the bottle and write:
Replace the marked bottle with a matte black bottle. Keep its position, size, shadows, and perspective consistent with the original.
This combines two kinds of instructions:
Visual instruction: “This is the area.”
Text instruction: “This is what I want changed.”
That combination can be much easier to understand than text alone.
Markup for text placement
Markup can also help when creating graphics.
You could mark an area near the top of an image and say:
Place the headline inside this marked area. Keep enough empty space around it so the text remains readable.
This is useful when composition matters.
I would still inspect the final image carefully because precise instructions do not guarantee perfect results every time.
Practical takeaway: When an edit needs to happen in a specific location, show the tool where you mean instead of relying entirely on words.
How to Remove Backgrounds and Resize Images
Background removal is another practical image-editing task.
For example, you might have a product photograph with a busy background but need a clean subject for a website or promotional graphic.
You can ask ChatGPT to remove the background and create a version with a transparent background when supported by the workflow.
A simple request could be:
Remove the background and keep only the product. Preserve the product edges and create a clean transparent-background version.
You can also request different image proportions.
For example:
- Square for social posts
- Vertical for mobile content
- Wide for blog headers
- Landscape for presentations
- Other dimensions required by a particular platform
When changing the aspect ratio, pay attention to the composition.
Simply stretching an image can make it look unnatural. A better instruction might be:
Convert this image to a wide horizontal composition. Extend the background naturally while keeping the subject at the center.
Previous versions can also be useful here. If one resize produces a better composition than another, you can use that version as your starting point.
Practical takeaway: Background removal and resizing are especially useful when one image needs to work across several content formats.
How to Turn Sketches Into Images
This was one of the workflows I found especially interesting because it changes how you communicate an idea.
You don’t need to be a skilled illustrator to create a useful visual plan.
A rough sketch can act like a blueprint.
In a ChatGPT conversation, you can use the @sketch command when that feature is available, then create a simple visual layout.
The sketch doesn’t need to look polished.
Imagine you’re planning a promotional graphic with:
- A person on the left
- A product in the center
- Text at the top
- Decorative elements on the right
You can draw those elements as simple shapes.
Then attach the sketch to a prompt such as:
Turn this rough sketch into a polished modern marketing graphic. Keep the same general positions of the person, product, and headline. Use a clean professional design with soft lighting and a contemporary visual style.
The sketch gives the model a visual map.
The written prompt provides the creative direction.
Why this matters
Sometimes I know exactly where things should go but don’t know how to explain the layout in words.
A sketch solves that problem.
It’s similar to giving a designer a wireframe before asking for the final design.
Practical takeaway: Use sketches when composition matters more than artistic quality. Your rough drawing only needs to communicate the structure.
How to Transform Your Own Photos
Photo transformation is one of the most accessible uses of AI image editing.
Start by uploading an existing image. Then explain what you want to change.
You could request changes to:
- Clothing
- Background
- Lighting
- Setting
- Color treatment
- Visual style
- Props
- Overall mood
For example:
Transform this portrait into a premium outdoor fashion editorial. Change the clothing to modern neutral-toned streetwear, use soft overcast lighting, and place the person in a natural urban setting. Preserve the person’s facial identity and overall pose.
The key is to clearly separate what should change from what should remain unchanged.
For example:
Change the background and clothing, but keep the person’s face, hairstyle, pose, and body proportions consistent with the original.
That gives the editing task a much clearer boundary.
Afterward, compare the transformed version with the original. Pay special attention to facial features and small details.
Practical takeaway: When editing personal photographs, explicitly state which characteristics must remain unchanged.
How to Combine Multiple Reference Images
Multiple reference images open up another useful workflow.
Instead of asking ChatGPT to invent every visual element, you can provide several references and explain how they should work together.
For example, you could provide:
- A person’s photograph
- A clothing reference
- A room reference
Then ask:
Use the person from the first image, the clothing style from the second image, and the room design from the third image. Combine them into one realistic photograph while preserving the person’s appearance.
This can also work for products, furniture, characters, visual concepts, and other objects.
A simple reference workflow
Step 1: Upload the first image.
Step 2: Add the second reference.
Step 3: Explain the relationship between them.
Step 4: State what should remain consistent.
Step 5: Generate the combined image.
Step 6: Review the composition.
For example:
Combine these two product references into one clean studio scene. Keep the original colors and recognizable features of both products. Place the smaller product slightly in front of the larger one, with consistent studio lighting and realistic shadows.
The more references you use, the more important your instructions become.
Don’t simply upload several images and expect the intended relationship to be obvious. Tell ChatGPT exactly what each reference contributes.
Practical takeaway: Label the role of every reference image. Say which image provides the person, product, clothing, environment, or design.
How to Create Graphics With Text
Generating images that contain readable text has traditionally been a difficult area for AI image tools.
ChatGPT’s image workflow can be used to create posters, promotional graphics, social media visuals, announcements, and other designs where text is part of the image.
Start by describing the type of graphic.
For example:
Create a clean promotional poster for an online AI workshop.
Then provide the exact text:
AI Productivity Workshop
Learn practical AI skills
Saturday, 10 AM
You can also describe placement:
Put the main headline at the top, supporting text underneath, and the event information near the bottom.
Then describe the visual direction:
Use a modern technology-inspired design, generous spacing, simple geometric elements, and a professional blue-and-white visual style.
After generation, check every word carefully.
Even when the overall design looks good, generated text can occasionally contain spelling, spacing, or formatting problems.
If something is wrong, refine it:
Keep the same design but correct the workshop title and make the headline larger.
This is usually better than rebuilding the entire concept.
Practical takeaway: Give exact text and placement instructions, then proofread the final graphic before publishing it.
Practical Ways to Use ChatGPT Images 2.5
After testing different workflows, I found that the biggest value comes from practical content creation rather than simply generating random artwork.
1. Social media graphics
Create post concepts, announcement graphics, visual quotes, campaign images, and promotional content.
You can create a base design and then adapt it for different aspect ratios.
2. Advertisements and promotional posters
Instead of starting with a blank design tool, you can describe the message, audience, product, layout, and visual style.
This can help you explore several creative directions quickly.
3. Personal photo transformations
Turn ordinary photographs into different visual styles, environments, or editorial concepts.
4. Product marketing
You can experiment with product scenes, backgrounds, compositions, and promotional concepts before final production.
5. Visualizing ideas
A rough business idea, website concept, product idea, or campaign can become a visual concept.
This is particularly useful when you need to communicate an idea to another person.
6. Educational content
Images can also support presentations, diagrams, study materials, and project visuals. For more student-focused resources, you can explore the Student Tools.
For broader marketing workflows, the Marketing Tools page can also complement AI-generated visuals.
Practical takeaway: The strongest use cases are the ones where visual experimentation saves time or helps communicate an idea.
Tips for Getting Better Results
After working through different image-generation and editing tasks, I found that a few habits consistently help.
Be clear
Don’t write a long prompt just because you think longer means better.
Tell ChatGPT what matters.
Instead of:
Make it better.
Try:
Make the lighting softer, reduce the background clutter, and keep the subject unchanged.
Include useful visual details
Mention details that affect the final image:
- Lighting
- Camera angle
- Composition
- Background
- Materials
- Colors
- Clothing
- Mood
- Aspect ratio
Separate changes from preserved elements
This is especially important for photo editing.
Use language such as:
Change the background but preserve the person’s face and pose.
Use markup for difficult edits
If you’re struggling to describe a precise location, mark it visually.
Use reference images
If appearance matters, showing an example can be more effective than describing every visual characteristic.
Refine instead of restarting
If 80% of the image is correct, don’t throw it away.
Ask for the remaining 20% to be fixed.
Check generated text
Always proofread posters, advertisements, labels, headlines, and other graphics containing words.
Practical takeaway: Good AI image generation is often an iterative process. Give the model a clear target, inspect the result, and make focused corrections.
Limitations of ChatGPT Images 2.5
Even after testing the different workflows, I wouldn’t treat ChatGPT Images 2.5 as a perfect replacement for every professional design or editing workflow.
Generated text can still occasionally be incorrect. This matters when you’re creating advertisements, posters, product labels, or other graphics that need exact wording.
Small details can also change between edits. A person may look slightly different, an object can shift position, or background elements may be modified when you only intended to change one area.
Another limitation is instruction accuracy. Even a detailed prompt may not always produce exactly what you imagined.
That means several rounds of editing may be necessary.
For important work, I recommend keeping the original image and earlier versions available. If a later edit makes the image worse, returning to a previous version can save time.
I also wouldn’t use generated images blindly for professional materials where factual accuracy, brand consistency, product accuracy, or exact typography is critical.
The tool is powerful, but it still works best when you treat it as a creative assistant rather than an automatic final-production system.
Practical takeaway: Review every important image before publishing it, especially when people, products, text, or brand details are involved.
Frequently Asked Questions
What is ChatGPT Images 2.5?
ChatGPT Images 2.5 refers to the updated image-generation and editing experience in ChatGPT. It can generate images from text prompts and work with existing images for tasks such as transformations, object changes, background edits, and other visual modifications.
How do I access ChatGPT Images 2.5?
Open ChatGPT and look for the Images experience in the interface. Available features can vary based on your account, platform, and current ChatGPT rollout.
Can ChatGPT Images 2.5 edit my existing photos?
Yes. You can upload an existing image and describe the changes you want. Depending on the task, you can modify elements such as clothing, backgrounds, lighting, objects, and overall visual style.
Can I add or remove objects from an image?
Yes. You can ask ChatGPT to add an object or remove an unwanted element. More specific instructions can help, particularly when you identify where the change should happen.
Can ChatGPT turn a sketch into a realistic image?
Yes, the sketch workflow can be used to communicate a rough composition. With an appropriate prompt, a simple layout can be transformed into a more polished visual concept.
Can I combine multiple reference images?
Yes. Multiple reference images can be used to communicate different visual elements. For example, one image could provide a person, another could provide clothing, and another could provide an environment. Your prompt should clearly explain how the references should be combined.
Can ChatGPT create images with text?
Yes. You can request posters, advertisements, social graphics, and other visuals containing text. However, always check the generated wording carefully before publishing because text can still contain errors.
Can I remove an image background?
Yes. Background removal is a useful editing task. You can request a clean subject-only image and, where supported, a transparent-background version.
Can I resize an image to a different aspect ratio?
Yes. You can ask for an image to be adapted to another aspect ratio or composition. For example, a wide image can be adapted for a square or vertical format. When doing this, explain how you want the subject and background arranged rather than simply asking for the image to be stretched.
What I Learned From Testing ChatGPT Images 2.5
After testing the different workflows, the biggest change I noticed is that AI image creation no longer has to be a one-shot process.
You can start with an idea, generate an image, edit it, mark a specific area, add another reference, change the background, remove an object, or return to an earlier version.
That makes the workflow feel much closer to working with a conversational creative assistant.
The ChatGPT image generator is useful when you want to create something from scratch. ChatGPT AI image editing becomes more useful when you already have an image and want to make controlled changes.
My main lesson is simple: don’t spend too much time trying to write the perfect first prompt.
Start with a clear idea.
Generate the first version.
Look closely at what worked and what didn’t.
Then make specific changes.
That iterative process is where I found the most value.
If you are creating blog graphics, social media content, promotional visuals, product concepts, educational materials, or simply experimenting with creative ideas, ChatGPT Images 2.5 gives you a flexible way to move from a rough thought to a finished visual.
And if the first result isn’t perfect, that’s not necessarily a failure. In my testing, the first image often felt more like the starting point than the final destination.